Yesterday I finally finished re-rendering our primary bathroom in Sketchup! Most of it was redoing what I’d previously done before I lost my progress, but I did have some new changes. This render unfortunately won’t be as high quality as my Dream Laundry Room Render because I needed to turn off shadowing to address a frustrating lag issue.
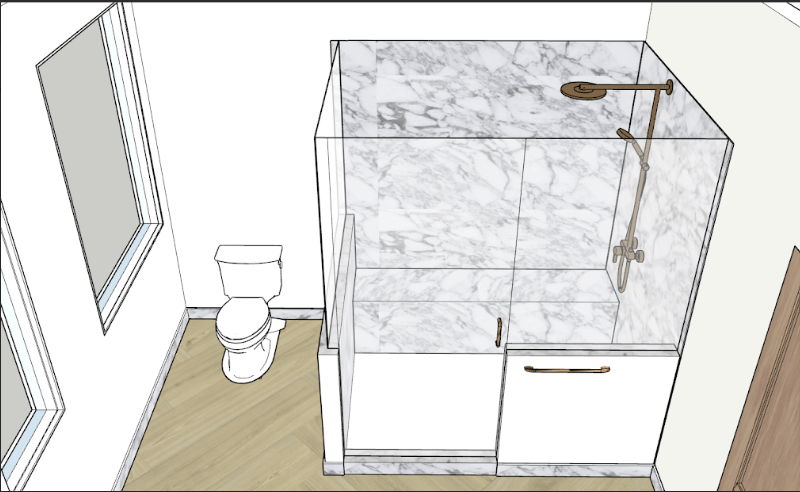
The finishes themselves should be pretty similar to what we laid out in our Dream Primary Bathroom Design, so please check that out if you want to know more about the materials in the renderings. Now let’s jump right in with a top down view!
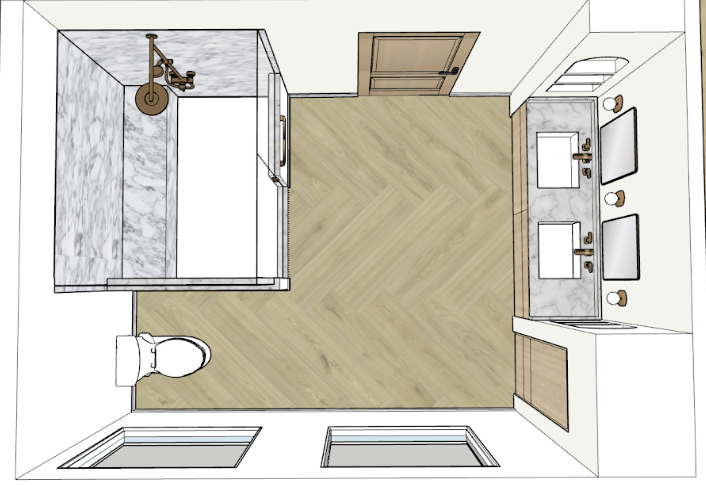
I’m very happy with this layout! I could not make our space work with a tub, but I feel like we don’t use a tub often enough to justify having it be unused and collecting dust.
The windows would be at a second story level due to our land’s steep slope and would also face our timber. That said, we’d still install curtains in case additional privacy is needed.
The shower/toilet are against the closet/fitness room wall. You can be sitting on the toilet and not be exposed if someone enters the bathroom without knocking! I also wanted the door to not turn into the shower for the same reason. With the shower head/pony wall placement, you’d be decently covered if the door opens unexpectedly.
The vanity is against the bedroom wall, and the door leading out goes to the primary hallway. I made sure to put the door far enough away from the vanity that someone could be standing at the sink or counter while another person enters the space.
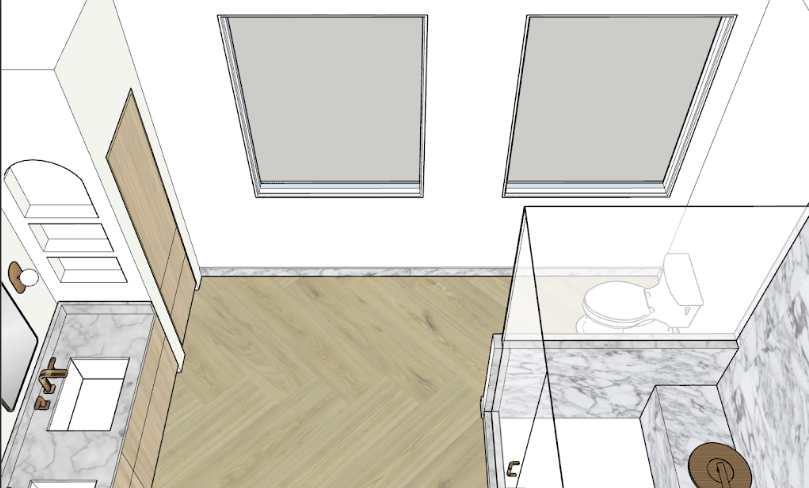
Here’s another view of the layout.

This is the style of curtains I’d pick. I couldn’t find a good curtain rod to snippet, so I just didn’t use one. In reality, we’d definitely have curtain rods lol.

Here’s the vanity wall view. I went back and forth on whether we’d have single or double sinks. The single sink on one side looked awkward when I rendered it, and I wasn’t willing to make it a designated vanity and lose cabinet space. Having a single sink directly in the middle made sense and looked ok, but I thought the lighting would be spaced too far apart given that the mirror would be scaled larger. Plus, you’d have to do your hair/makeup over the sink anyway to keep the lighting even, which negates the extra counterspace argument. I ultimately went with double sinks and plan on keeping the countertop free of clutter.
For the tall cabinet, I thought it’d look cool to have it framed into the drywall. I’ve been seeing that design here and there, and I like it! This cabinet would be used to store less frequently used items, towels, toilet paper, etc. It’d also be great for storing bottles that need to be upright.

Here is what I’d start off with on our bathroom countertop. Before you come at me for not hanging up the hand towels, I didn’t have wall space to install/hang towel rings or bars due to the built in shelves. I also came up empty handed after lots of searching for cute towel stands and an amazing designer demonstrated that you don’t have to hang your towels. Look at those links! There isn’t even any hardware to hang hand towels in those beautiful designs! Now, for all other bathrooms I’d include a towel bar or ring for our visitor’s sake.
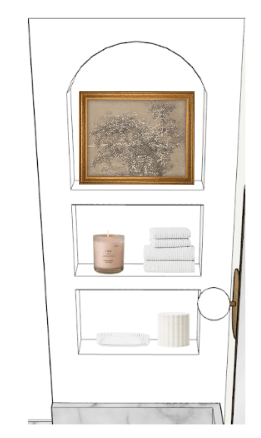
Here is how I’d style one of the sets of built in shelves. We have some art, a candle, extra towels, a dish for storing jewelry, and a small marble canister I’d fill with cotton pads (I don’t use them that often, so wouldn’t mind having to remove a lid). You may be wondering why I don’t have a live plant in this bathroom that gets so much natural light, but honestly we’re not doing so great with plants except for our Monsteras. I loved putting together our wedding flower arrangements, so maybe I’ll do a faux arrangement that fits our bathroom theme someday.
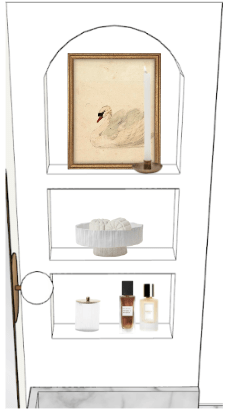
And this is what I’d use for decor for the other set of shelves. I have more art, a pedestal bowl filled with shower steamers (haven’t tried them yet, but have heard good things), a glass canister for q-tips, and our everyday perfume/cologne.
This is what the shower/toilet wall would look like. I’d keep the trash over by the toilet and there’d obviously be a toilet paper holder.
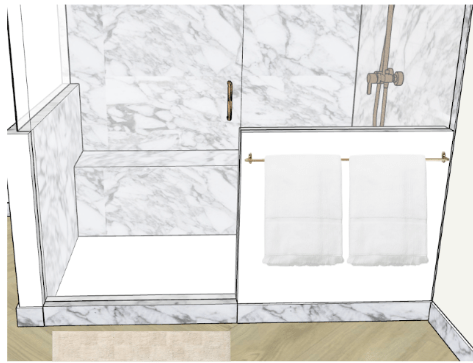
It’s hard to see, but the bath rug is actually a light pink checkered pattern! I thought it would tie in the other pinkish elements. I also went with white towels so the marble baseboards, wood flooring, and white pony wall would be the focus.
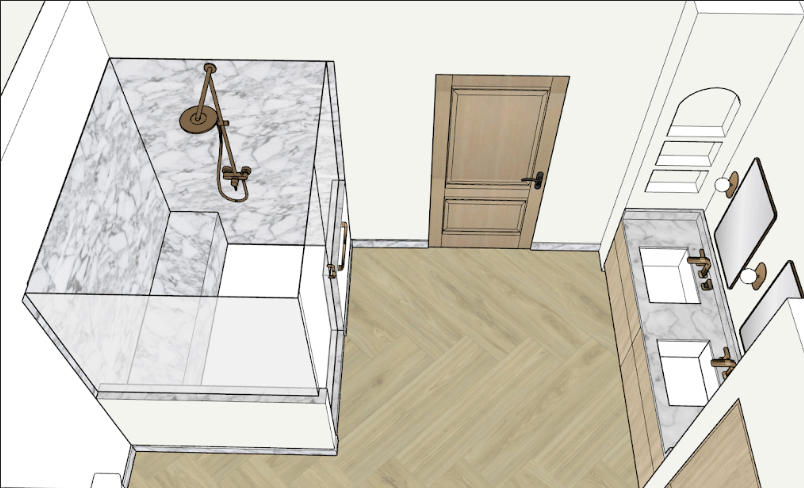
And here’s a final view of the bathroom, from the other direction!
What did I learn from this render? Well, I originally had the tall storage cabinet going to the ceiling, but I made it door height with drywall above because it was feeling ridiculously tall. I also learned a lot about what spacing would work best for the lighting and mirrors.
Finally, finding decor that is the right size, matches the functionality of the room (a tip I learned from Made For Living by the designer of those bathroom links), and is the right scale is HARD. I spent hours looking for objects that fit our bathroom’s style and I later eliminated a few after mathing out what would actually fit on the shelves. I can now see why styling shelves is an art and to limit the areas of our house that require styling! Extra shelves = extra money for decor and upkeep with dusting. However, in this space I knew we’d have a few things we’d want left out and making a shelf moment out of it was going to keep our counters clear.
Obvious disclaimer that we don’t have set floor plans yet, and this design may change once we determine what’s feasible within our budget and on our lot.
I hope you enjoyed this post! Thanks for reading! 🙂
Davien

Leave a comment